Okay, here we go, the first step in solving the Rubik's Revenge. When you finish this step your cube will look like this:
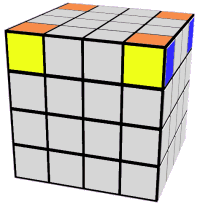
STEP 1 - First Corner
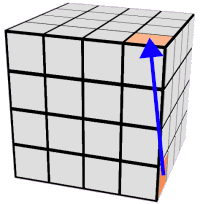
Start by finding the Yellow/Orange/Blue corner and rotate the entire cube in your hands until you match the cube below. Our goal for the 4 top corners is to place each of them into this front-top-right position:
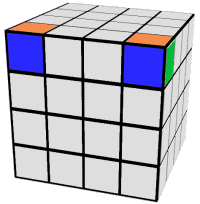
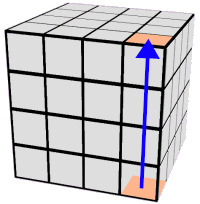
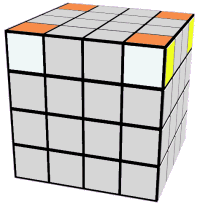
Before looking for the next corner, spin the entire cube in your hands one turn to the left. This will move the Just Finished piece out of its corner position so that we can put the next piece in place. When we finish this step you will have these corners completed.
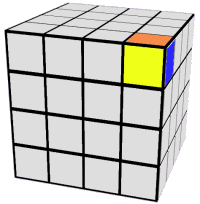
Since we are looking for the Blue/Orange/Green corner, rotate the bottom layer until you can position it directly below where it belongs - in the front-bottom-right corner. If you can not find the piece on the bottom layer skip to the THIRD corner and return to this step a little later.
If you did find a match, follow one of the three steps below to move the piece into its proper place.
 |     |
 |   |
 |
|
Before looking for the next corner, spin the entire cube in your hands one turn to the left. This will move the Just Finished piece out of its corner position so that we can put the next piece in place. When we finish this step you will have these corners completed.

Since we are looking for the Orange/Green/White corner, rotate the bottom layer until you can position it directly below where it belongs - in the front-bottom-right corner. If you can not find the piece on the bottom layer skip to the FOURTH corner and return to this step a little later.
If you did find a match, follow one of the three steps below to move the piece into its proper place.
| |
| |
|
|
Before looking for the next corner, spin the entire cube in your hands one turn to the left. This will move the Just Finished piece out of its corner position so that we can put the next piece in place. When we finish this step you will have these corners completed.
Since we are looking for the Orange/White/Yellow corner, rotate the bottom layer until you can position it directly below where it belongs - in the front-bottom-right corner. If you can not find the piece on the bottom layer skip to FIXING PROBLEM CORNERS and return to this step a little later.
If you did find a match, follow one of the three steps below to move the piece into its proper place.
| |
| |
|
|
STEP 5 - Fixing Problem Corners
If the top 4 corners are now finished, you may proceed to Solving The Top Centers.
If not, you have possibly run into the situation where there are no more pieces to place on the bottom layer but all of the top is not yet finished. This means that either:
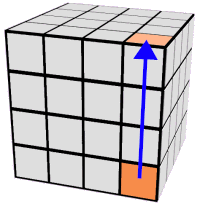
In either case, you need to move the incorrectly positioned piece to the bottom layer so that you can use one of the step above to correctly put it back in place. Simply position the problem corner in the standard front-top-right corner and perform the following move.
Now the piece is on the bottom layer and you can go back to a previous steps to correctly place that piece:
